Showing posts with label lifestyle. Show all posts

Chocolate Chip Cupcakes with Peanut Butter Centre's

Saturday, 23 March 2013


The other week I fancied a little naughty treat and decided to make these light and fluffy chocolate chip cupcakes with gooey peanut butter centre's!
 
They turned out perfectly! Super light and moist (ok, they are a little burnt around the tops but they didn't taste it!) with a hidden surprise in the middle!
 
To make these you will need:
 
100g sugar
115g butter
150g self raising flour
1 egg
Chocolate chips or chunks
Peanut butter (I used crunchy)
 
~ Preheat oven to 190°C and grease a muffin tin
 
~ Cream butter (I softened mine first in the microwave a little) and sugar for 1 minute (I used my electric hand mixer)
 
~ Add the egg and beat on low until combined
 
~ Sift in the flour and add chocolate chips or chunks and mix together with a wooden spoon (or spatula or any other tool you have handy!)
 
~ Scoop a small teaspoon of mixture into the muffin tin, then add a small spoonful of peanut butter and then top with another spoonful of cake mixture.
 
~ Repeat until muffin tin is full (my mixture made 6 generous sized muffins!)
 
~ Cook for 15mins or until golden brown.
 
~ Devour while still warm!!
 
 
I'm so excited - I've finally took the plunge and ordered myself a beautiful, shiny stand mixer! Just waiting for it to arrive - cue lots of baking, treats and recipes very soon!
 
 
Have you tried making these? Let me know what you think :)
 

Makeover

Saturday, 16 March 2013


After careful deliberation and being on and off hiatus for just over a year i have decided to take this blog forward in a slightly new direction.
 
That can only mean one thing! ... A MAKEOVER!!
 
So tadaa!! Welcome to my all new blog!
 
Apart from the visual aesthetics of my blog undergoing a makeover (thanks to the very talented Kayla) i have also renamed my blog to fall in line with my new craft store.
 
Kirsti @ the Notebook is now ... and pictures on my wall.
 
Since fleeing the family nest and moving in with my boyfriend, fashion and beauty has taken a back seat. I am still very much interested in these things and am still reading your blogs daily but for me personally my priorities have changed. I have taken on the role of housewife (while still working a 9-5!) and am relishing my new role. I’ve learnt to cook! I DIY (well, i DIY’d before as my full-time job requires these skillz) and am a proud step-mummy. I find myself reading home decor magazines and searching for new recipes rather than picking up a gossip mag or trying to hunt down the latest MAC collection.
 
So with that in mind i have decided to move forward with a more lifestyle & home based blog (while incorporating some of the ol’ favourites like reviews, DIY/handmade projects, etc). I will also be using this space to showcase some of my crafty wares that i recently launched.
 
I would love to hear from you - I’m looking for feedback on my craft items, guest bloggers (whether it be showcasing your handmade items, recipes, DIY skillz, etc) and general chit chat about what content you’d love to see around here now on 'and pictures on my wall'.

I'm sure you've all heard by now but Google Friend Connect is departing us and while I'm a little annoyed about this I have embraced some new tools to help you guys follow me easily so you don't miss any of my updates!

You can follow me via Bloglovin' (don't forget you can import all of the blogs you follow on GFC by going to this link!), Hellocotton and NetworkedBlogs. You can also find the easy 'Follow me' icons down the left-hand side of my blog!
 
I do hope my you stay around and join me on this new journey, take care for now ...


Cooking with Kirsti #2

Thursday, 6 December 2012


Why hello there!!

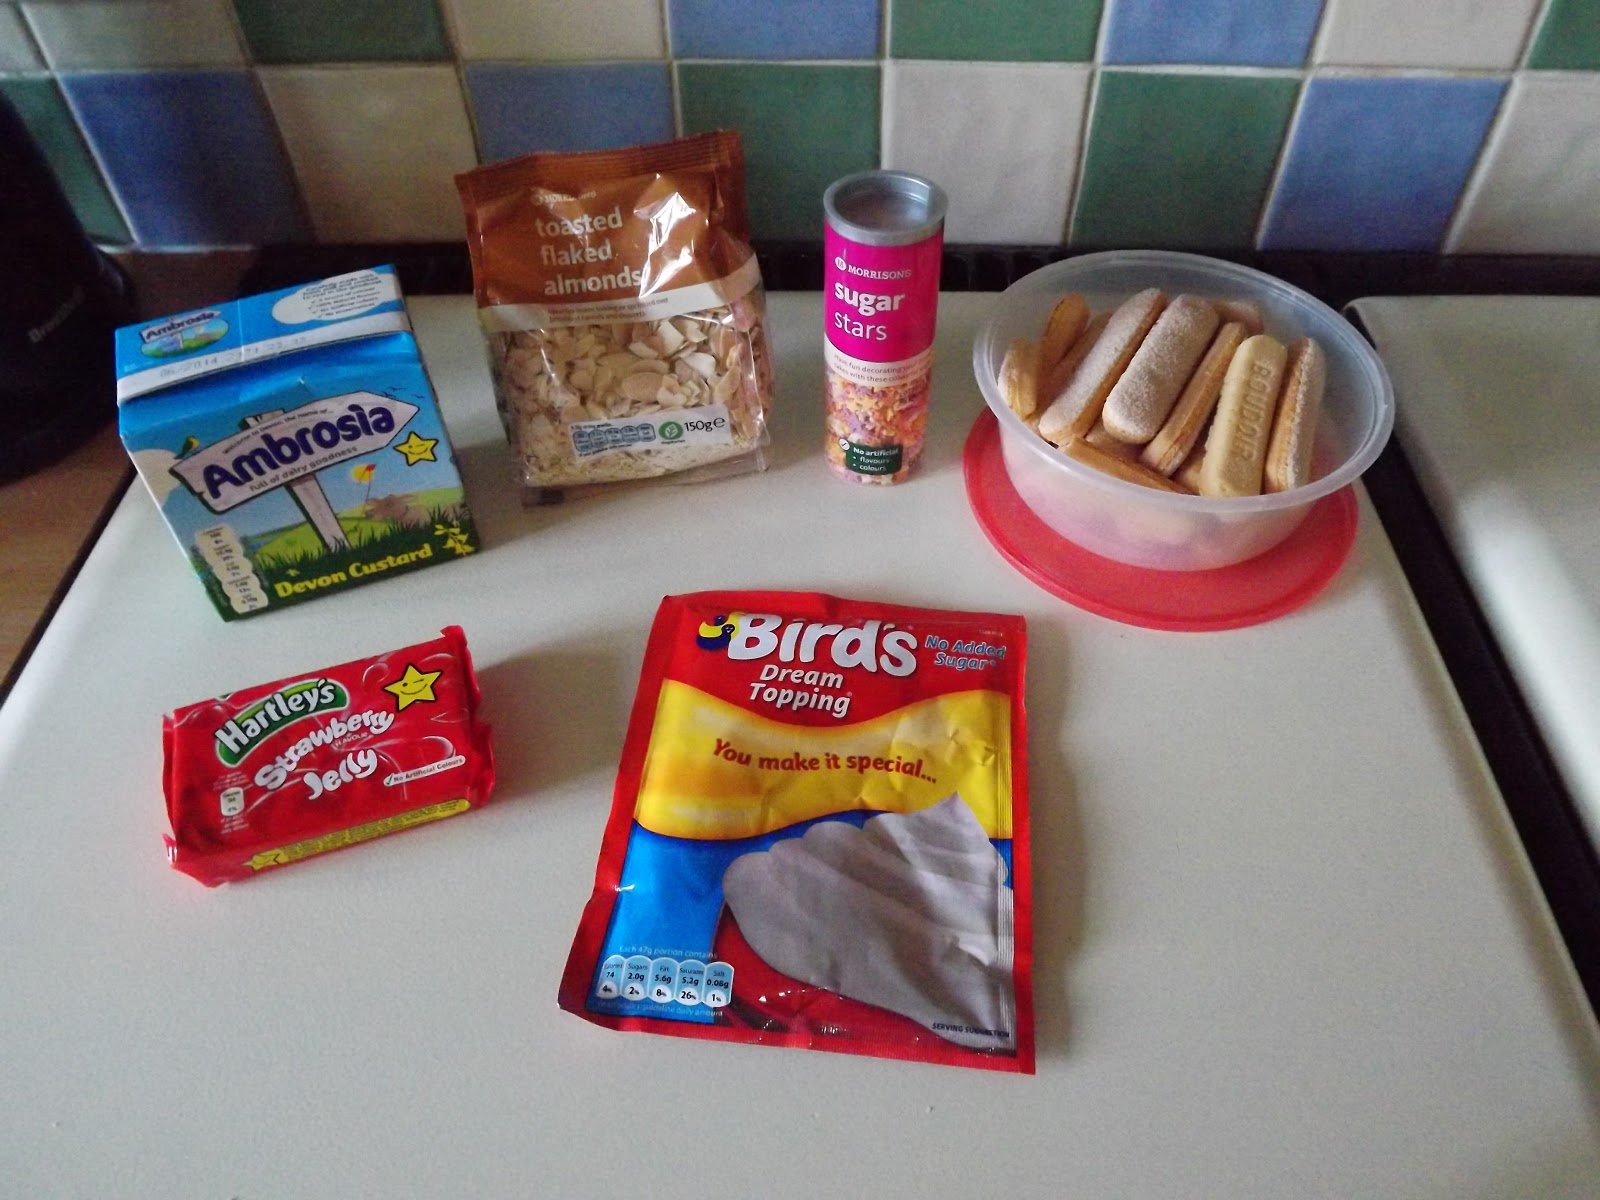
Another installment of Cooking With Kirsti ... today (well Sunday!) i made my first ever trifle. Decided to give myself a head start and do a practice run for Christmas Day. Very easy to do, so i'm pleased with that :) Here's what i did ...

Ingredients:
 
Jelly (strawberry)
Sponge fingers
Custard
Dream Topping
Flaked Almonds
Dark chocolate
 
Firstly i took my trifle bowl (i say trifle bowl, i don’t actually own one yet! I had to buy this Pyrex bowl when buying the ingredients as that’s all they had, lol) and laid sponge fingers over the bottom of the bowl as a base ... i think when i make this again i may use different sponge instead of the fingers but that’s purely for aesthetic reasons.

 
I then made up the jelly and poured over the sponge base. The sponge fingers then rose and mixed in with the jelly. At this point you could add some fruit pieces to the mix but i forgot to buy fruit when shopping! I left this overnight to set in the fridge.

 
The next day i poured a carton of custard over the jelly and sponge. As mentioned in my first cooking post I’m a lazy cook so i bought pre-made custard, you can make your own if you wish (and have the time!)

 
I then mixed up the Dream Topping. I have never even heard of Dream Topping before, my mum always uses whipping cream with icing sugar for the topping of a trifle but the boyfriend insisted i made it the ‘proper’ way so i hunted it down and gave it a whirl. O.M.G !! Why have i never tried this before, it was absolutely amazing ... i even licked the bowl!

 
To finish I quickly crushed up some flaked almonds and made some dark chocolate shavings and sprinkled over the top. I then left to set for a couple of hours in the fridge and viola! A simple, pimple trifle!
 
 
What trifle tips do you have?
 
xoxo
 
 
Photobucket

Cooking with Kirsti #1

Wednesday, 28 November 2012

Lets rewind the clock 12 months shall we!

I was a very undomesticated chicka spending my time between living at home with my parents and living out of a bag at the bf's. Now i have my own place, do all of the cleaning (yep that's right Samuel i have named and shamed you :p ) and have some cooking skillz which have appeared from nowhere!

I'm hoping to share some of my cooking accomplishments here on the blog - the majority of them will be simple and quick #winfortheworkinggirl

Today we have Sausage Casserole:


Ingredients:

Sausages
Onions (I used 1 large white and 1 small red)
Peppers (Green, yellow, red)
Mixed Mediterranean veg medley (not pictured)
Herbs (Mixed herbs and basil)
Stock pot (not pictured)
Gravy granules (not pictured)
Casserole mix

I decided to use the slow cooker to cook the casserole as i put this on at about half 10 in the morning after breakfast one Sunday and did the housework while it was cooking, by the time i had finished a top to bottom clean it was lunchtime and ready to eat, yum!

Firstly i cooked through the sausages in the oven for 20 mins.

I get very confused with slow-cooker cooking. I have a cookbook dedicated to cooking all things slow and it always says to cook the meat and veggies first - surely this defeats the purpose of the slow-cooker!?

Anyways, while the sausages were cooking i chopped up the onions and peppers and fried them off on the hob until soft and then added them to the slow cooker.

I then added a handful of frozen Mediterranean vegetables, herbs (i used a shake of mixed herbs and a pinch of basil), a Knorr stock pot, a tablespoon of gravy granules (Bisto Best), 300ml of water and the contents of a Casserole mix packet (this was in fact a lamb version that you are meant to shove in a bag and cook in the oven but I'm a maverick and don't follow the rules :p )

I then added the sausages and stuck the slow-cooker on medium. It then cooked for around 3 hours; stirring occasionally.

I served this with Yorkshire pudding boats but #bloggerfail i didn't take any final pictures!

You may notice that some of the ingredients aren't pictured - I'm one of those cooks that scours the cupboards as they go seeing what else they can throw in or needs using up :) anyone else do this!?

It was a rather scrumptious dinner, albeit a little bit cheating with the packet mix but hey-ho ... I'm a busy gal ;)

Hope you enjoyed my first cookery lesson - let me know if you'd like to see more :)

xoxo

Photobucket
Made With Love By The Dutch Lady Designs